Brick Masonry Surface Security Camera Installation Guide

Electrical Box Mounts are Recommended for Brick Surfaces
This guide covers installing a security camera to a brick wall face while using an electrical box mount. We recommend using an electrical box mount on brick because the camera won't be able to sit flush against the wall. Our electrical box mounts are optional.
Electrical box mounts are recommended for brick and masonry because brick walls are not flat, so the camera can't sit flush against the wall. The mortar creates enough air space to allow quite a lot of airflow, leading to heat loss in winter and AC loss in summer. The electrical box mount allows to stop that airflow by caulking the hole for the camera cable without losing the ability to use the camera cable connector.

Step 1: Apply Security Camera Mount Template
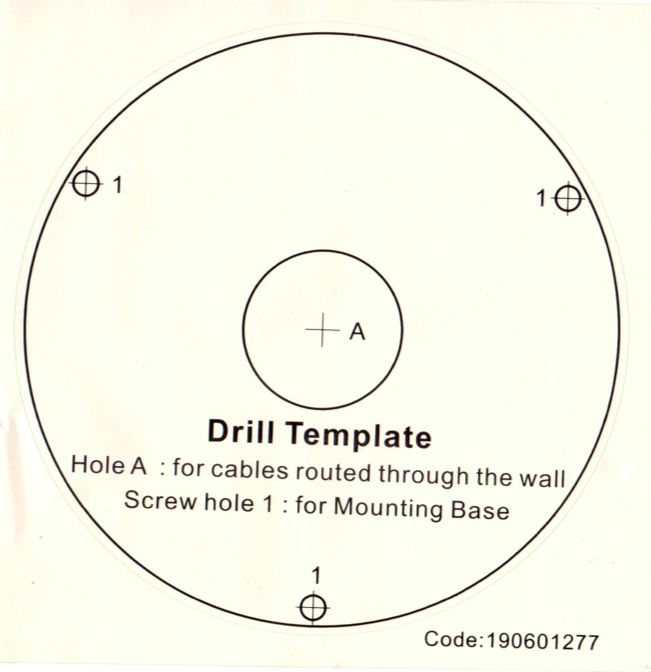
Using the adhesive template supplied with your camera or mounting box apply template to the mounting surface. The adhesive template is shipped with every camera. If you lose the adhesive template, one can be downloaded by navigating to our IP Camera page and clicking on your camera model. From the camera product page, click the link for the template on the "Downloads" tab.
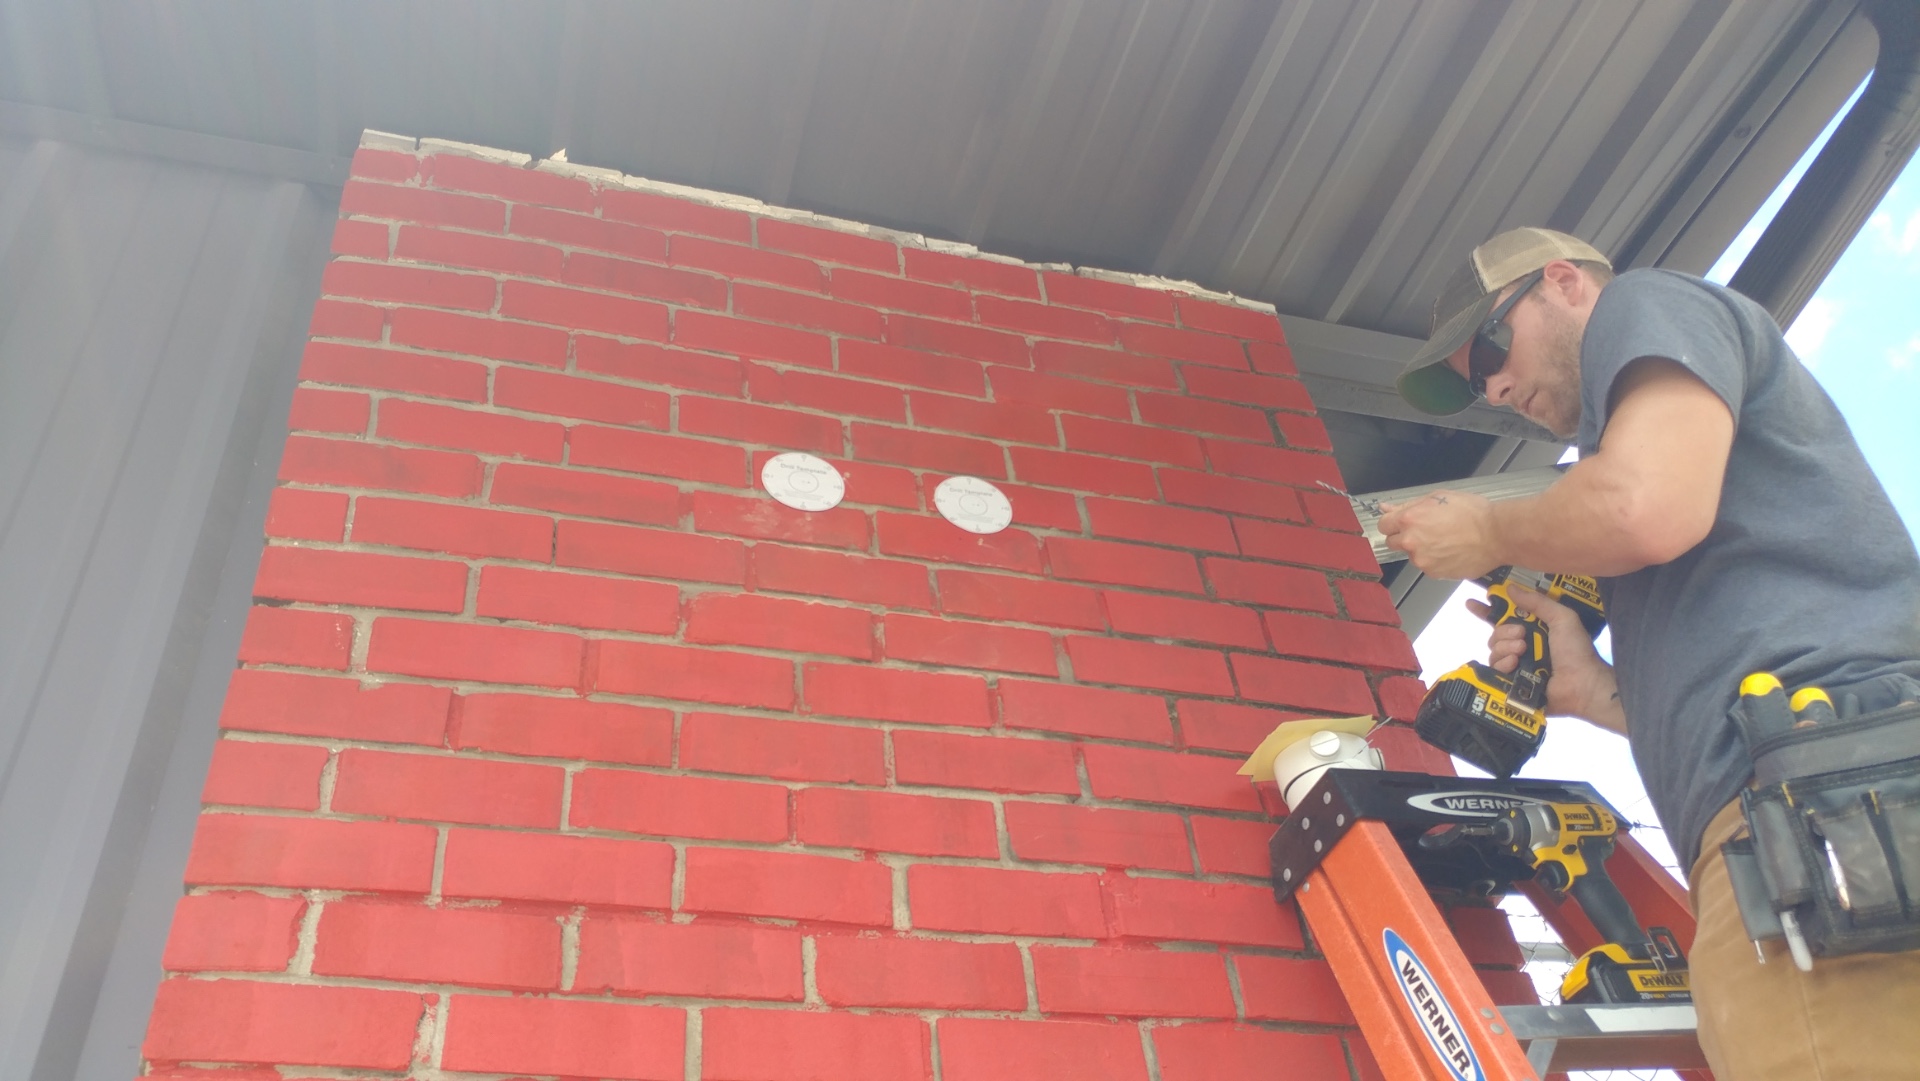
Step 2: Using a Hammer Drill and Masonry Bit, Drill the Pilot Holes in the Masonry for the Security Camera Mounting Screws
Using a hammer drill and a 5/32 masonry drill bit; drill pilot holes in each location marked on the mounting template.
A regular drill will probably not have enough power to bore through the brick.
A regular drill bit will dull quickly when used on brick or concrete, since it's only designed to drill through wood. Masonry bits are made of harder metal.

Step 3: Drill Camera Ethernet Cable Hole
If you are running the cable through the wall drill a hole large enough for the ethernet cable, a 1/2in to 1in drill bit should be sufficient. The location of the hole is marked on the center of the mounting template.
If you are running the cable along the wall, you can skip this step. You will want to follow the guides on connecting Flexible Metal Conduit, Electric Metal Tubing (EMT), or Liquidtight Plastic Tubing to one of our Security Camera Electrical Box Mounts.

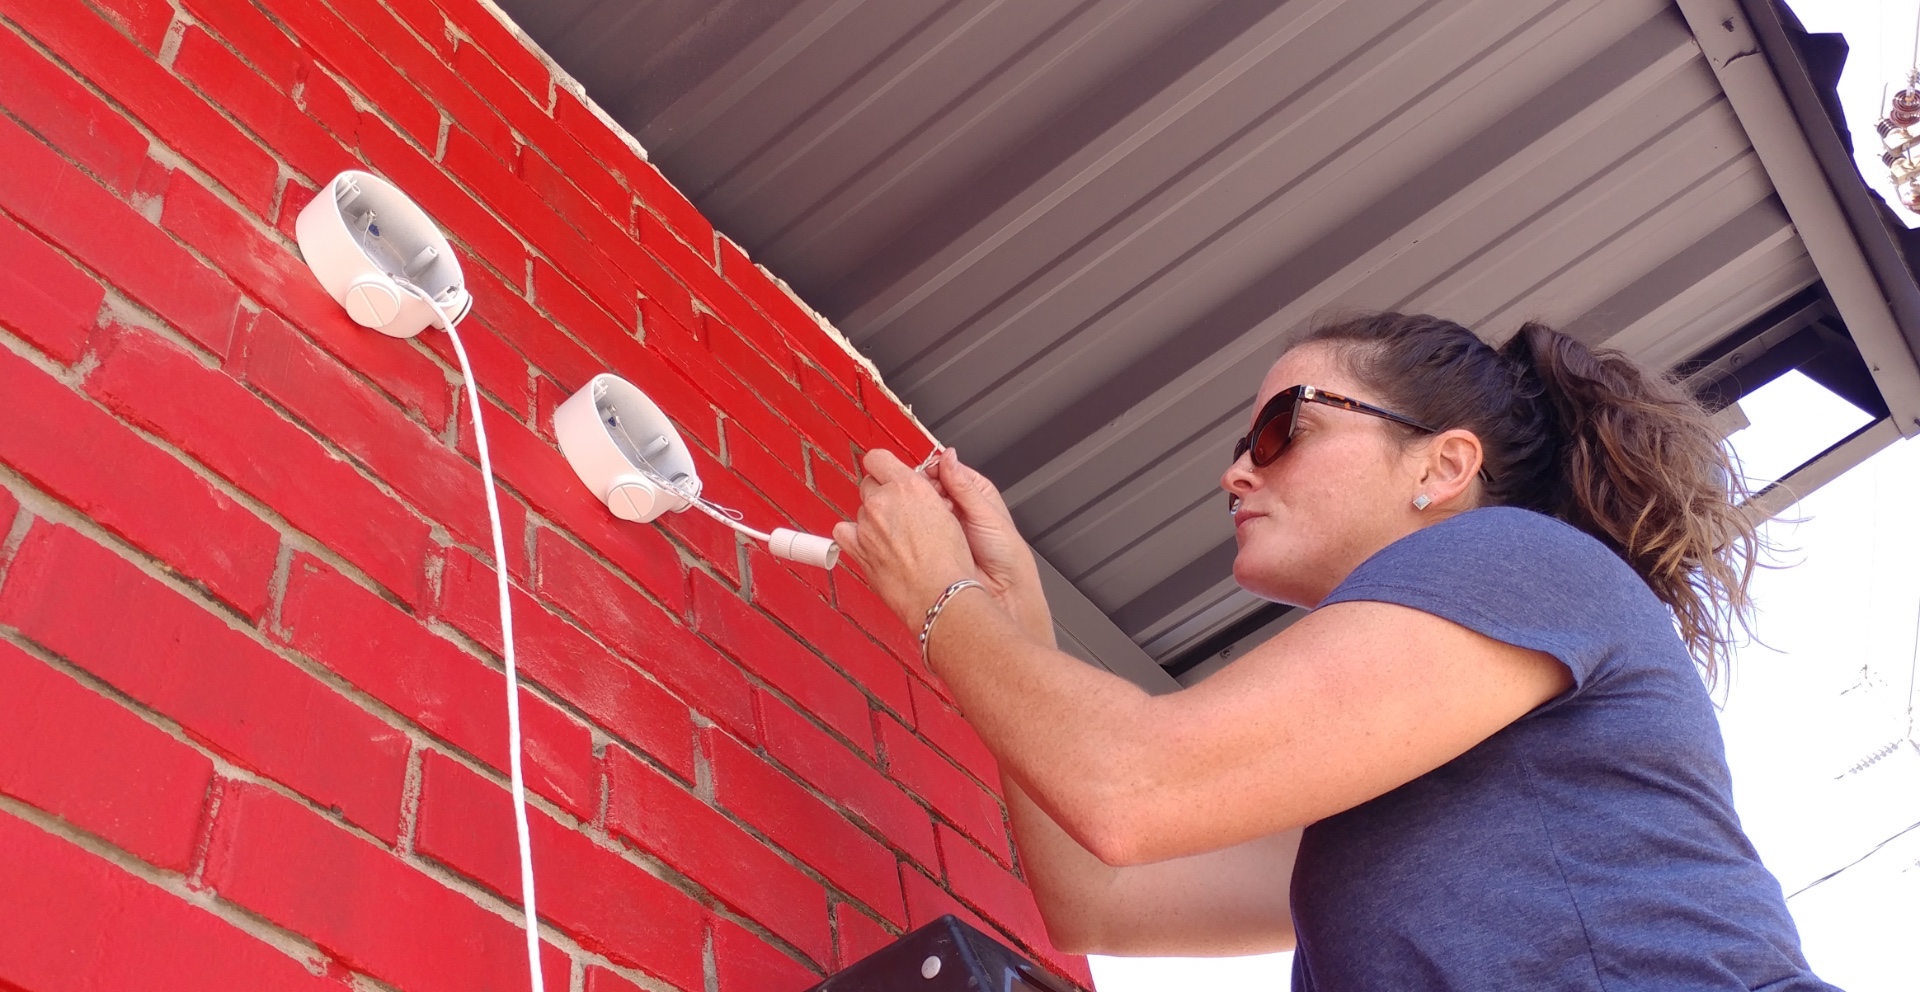
Step 4: Screw the camera bracket to the wall
Using the supplied screws attach the camera or camera bracket to the wall. Use hand tools to prevent from stripping the mounting points.

Step 5: Run Ethernet Cable through the Hole
Run ethernet cable through the mounting box, install the weatherproof connector, and terminate the end of the Cat5 cable.
Step 6: Attach Camera to Mounting Bracket, Plug Camera into Cat5 Cable
Our bullet camera electrical box mounts have a removable faceplate, we recommend attaching the camera to the faceplate before climbing the ladder.
Our dome camera models usually do not have this faceplate.
Just Getting Started with Security Cameras?
Get the SCW Beginner Guide!
New to security camera systems? Confused by Analog vs IP? Bullet vs Dome? Indoor vs Outdoor? Don't even know what PTZ means?
No problem! Download the SCW Beginner Guide and get all your questions answered right away!
